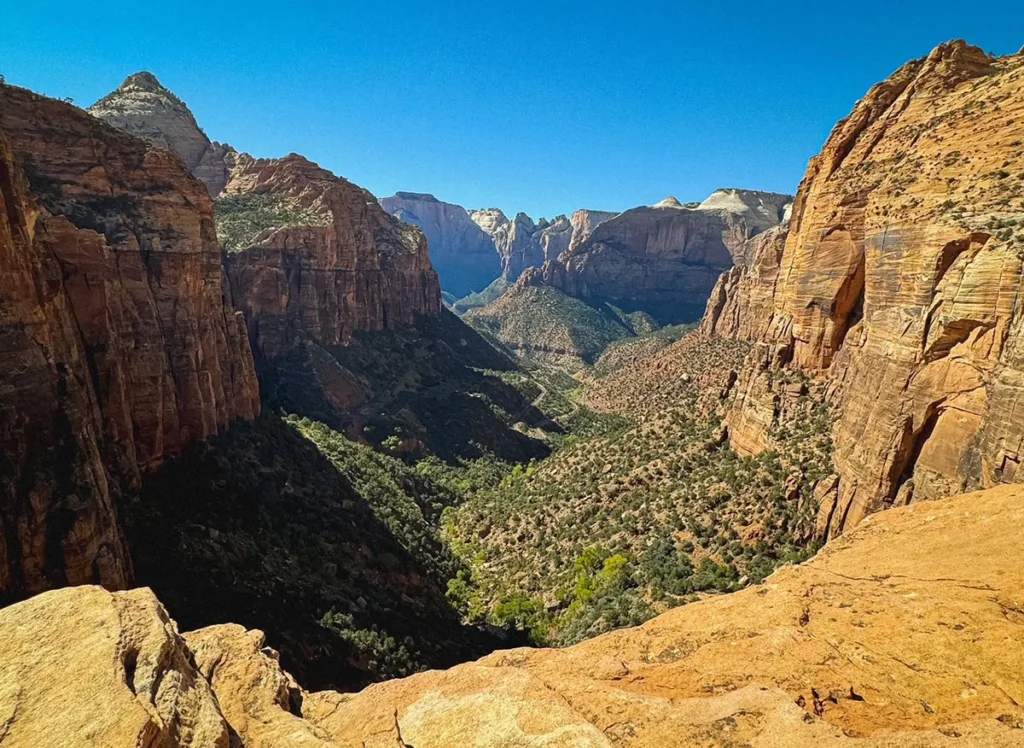
For those looking for a short hike with a great payoff, the Canyon Overlook Trail is the best option in Zion. At only 1 mile in length, hikers can see a stunning view and a fun hike along the canyon. Read on to learn more for advice and hike information.

About the Hike
Distance: 1 mile | Type: Out & Back | Avg. Time: 30 mins | Difficulty: Moderate | Dog Friendly: No
The canyon overlook trail is a short easy hike to a beautiful overlook of Zion Canyon. There are a lot of viewpoints of the canyon but this is one of the easiest to do for the biggest payoffs.
Located on the east-canyon side of the park, it gives viewers a breathtaking view of the canyon floor and the areas from this viewpoint. It’s worth a visit even if you have visited other overlooks such as observation point.
Note: The hike is within Zion National Park which is a US Fee Area. Access to the park is $35.00 per private vehicle or included with an annual America the Beautiful pass.

Canyon Overlook Trail Trailhead & Parking
The trailhead for the Canyon Overlook is directly outside of the east-side of the Zion-Mount Carmel Tunnel. You’ll see the trailhead on the northside of UT-9
The hardest part for this trail is probably parking. There is a small parking lot near a vault toilet close to the trail that is the main parking area. There is also a parking area across the road from the trailhead, however, you can only access it eastbound through the tunnel (you cannot turn left into this parking lot.
Additionally, there are areas along the road you can park. Be sure to be fully off the road when parking and look for any parking restriction signs.
Even the National Park Service warns that parking is tough here. Thankfully the trail is pretty short, so there is often turn-over on parking. But you may need to check several times.
I would recommend if you see a spot, take it, even if it’s a bit of a walk. If you don’t find a spot closer you may get stuck going through the tunnel before turning around.

Best Time to Do the Hike
The hike is pretty good to do year round, thanks to its easy access and short distance. The best time to do the hike is during the best months for Zion which is generally late spring and fall.
Summers in the park are incredibly hot. Even with the short distance we recommend you prepare for the heat and weather. Meaning, bring more water than you expect, wear a hat, sunscreen, etc.
Winters are fine as long as snow and ice are not a problem on roads or trails. There are a few areas where this would be possibly tricky. Thankfully the most exposed areas of the trail do have railings and fences.
The Canyon Overlook Trail Hike
Make your way to the trailhead along the northside of UT-9 close to the tunnel entrance. At the trailhead you’ll see a set of stairs rising, which is the start of the trail.

Basically all of the climb in the hike is in this early part. So once you top out on this area, you’ll be mostly flat for the rest of the hike.
If you look back you’ll get a nice view over the tunnel as well and the area you climbed by.

The one easy part of this hike is that the most exposed areas of the hike have rails/fences to prevent you from worrying about falling off. This makes any of those areas pretty comfortable to walk through I think even if you have some fears of heights.

About 0.2 miles into the entire hike, you’ll have a little overhang area which is a nice spot to get some views over the area and a nice photo.

The trail continues to wind through the canyon. There’s a few stairs and some easy areas to walk through. About 0.2 miles in total later you’ll come to the one area that’s the trickiest of the spots on the hike. Here you’ll be going along a ridge that has a decent drop to your left and the most exposure.

You’ll have a few spots where you’ll need to go one at a time and allow folks to pass by.
After coming through this, you’ll see one last area that you’ll need to ascend to the view point. It’s steep but short.
The overlook area is pretty big, you can see a sign and a fenced area for the viewpoint.

To your left you’ll see a rock outcropping. You can actually get up this pretty easily if you climb from the backside of the outcropping.

And that’s about it, from here, you can stay at the viewpoint and then return the same path back to the trailhead.
Tips & FAQs
- Find parking where you can. I would recommend getting within 0.3 miles of the trailhead and looking. Trouble is that if you go too far it may be difficult to turn around in places.
- Bring water, at least 1 liter in hotter months. Even in October when I went it was pretty hot and sunny during the day.
- Wear boots or good sneakers/trail runners. It’s not a tough trail but there are rocky areas where good footwear is beneficial.
Other Posts You May Like
- UTAH: 25 Fabulous Day Trips from Park City Utah (2023)
- UTAH: How to Hike the Grand Wash Trail – Capitol Reef National Park
- UTAH: Completing the Hickman Bridge Hike – Capitol Reef National Park
- NEVADA: Guide to Lehman Cave Tours – Great Basin National Park
- MULTI: ULTIMATE Denver to Moab Road Trips (Epic National Park Stops)
Leave a Reply