Devil’s Garden Trail allows you to get up close to several arches within this multi-mile hike. I don’t think any other hike in Arches has a concentration of arches that visitors can see on a normal trail. This and Delicate Arch are my two favorite hikes in the park.
The hike is a mix of easy and quite difficult obstacles. The hike’s difficulty changes depending on how far you go and what you decide to do. We help you break down what to see, how to see it, and the best way to get there.
Read along on the guide to learn more.

About the Hike
Distance: 2.4 – 8 miles | Type: Out & Back / Loop | Avg. Time: 1 – 4 hours | Difficulty: Easy – Difficult | Dog Friendly: No
The Devil’s Garden Trail is possibly the best hike in Arches National Park. It allows visitors to see many of the best arch examples along some fun traverses. This hike feels both front and backcountry and it has everything you’d want in a hike.
The hike varies wildly in difficulty depending on how far you go. Most visitors will travel from the trailhead to the Tunnel, Pine Tree, and Landscape Arches before returning to the trailhead. You’ll touch on the trail as it turns sandy and catch some great arch examples. At this point, I rate the hike easy; for most folks, it’s the perfect hike length (at 2.4 miles) and difficulty.
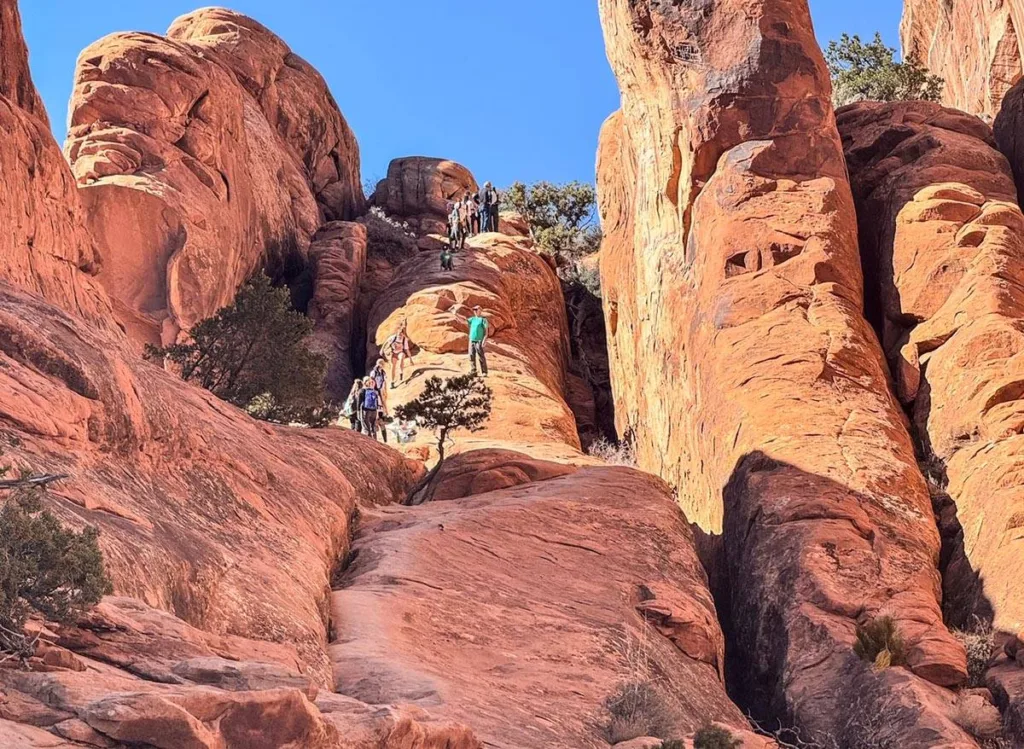
Beyond this point, the trail becomes what is known as the primitive trail. It’s a mix of sand, cliffs, slickrocks, and occasional pathfinding. Here’s where the trail gets difficult but also more rewarding. There are plenty more arches to see and the further you go the fewer folks you’ll encounter.

When you get to the primitive trail sandy area, you have the option of going clockwise or counterclockwise. The choice is important here. Many folks decide to visit the Double-O arch and turn around. If you plan to visit the Double-O arch and turn around, clockwise is the better option.
If you want to do all of the arches and the entire primitive loop, we recommend going counterclockwise. There is one very tricky cliff, which is ‘easier’ ascending than descending. We made the mistake of attempting this by descending the cliff, which was scary and risked injury. Don’t do what we did. Even ascending is not easy I will add.

Devil’s Garden Trail Trailhead & Parking
Trailhead: Location
The Devil’s Garden Trailhead and Park is located at the far end of Arches National Park Road. You really can’t miss the parking and trailhead. There’s a loop through the parking area. The closer you park to the bathrooms, the closer you are to the trailhead.
The parking lot here is large but can fill up during high periods.
Best Time to Do the Hike
The hike is pretty accessible much of the year. I would avoid hiking mid-day during hotter months. The trail is fairly exposed, so you’ll be in direct sunlight for most of it.
If you are only planning to go as far as Landscape Arch the hike is accessible in most weather even following a rainstorm. For those planning to do the primitive trail, we do not recommend doing this part of the hike when trails are snowy/icy or following a rainstorm. You’ll be traversing areas of narrow slickrock and it will be dangerous.
Spring and Fall are great months to do the Devil’s Garden Trail. The weather is the best, with cooler days. Late March – April and mid-September to October are the best months, as they avoid the heat of summer and monsoons.
The Devil’s Garden Trail Hike
I’m not going to do this in my typical step-by-step fashion. This is because the trail can be done in either direction and depending on what you want to do is the direction you should go. If you plan to do the entire loop we recommend counter-clockwise. If you plan to only go as far as a specific arch (like Double-O Arch), clockwise is the better direction.
For the guide, I’ll explain the shorter hike to Landscape Arch and the various sites along the trail, as well as provide information/tips for visiting those. My battery also died during the hike, so I missed some photos.

Trailhead
Begin the hike from the Devil’s Garden trailhead. You’ll find the trailhead sign to the right of the bathrooms. The trail here is beautiful. You’ll see the massive slickrock fins on either side of you. It’s such a beautiful hike even from the start.


About 0.25 miles beyond the trailhead, you’ll see a spur to your right. From here, you’ll be able to visit two different arches. On the spur, if you turn right, you’ll head towards Tunnel Arch. Return and go in the other direction to visit Pine Tree Arch. Both are very quick visits from the main trail. The spur to both trails is about 0.6 miles in total.

Return to the main trail and continue for a bit more than half a mile. Here’s where you’ll come to the primitive trail. We’ll cover each of the arches you can visit as separate items. And then we’ll discuss a bit of the loop afterward for tips on doing that.
We’ll show the distance on the Loop Clockwise [C] and Counterclockwise [CC] from the primitive loop start.
Landscape Arch
Distance: C: 0.1 miles | CC: 5.3 miles
This is probably one of the most famous arches in the park. If you want an easy hike I recommend visiting here for the beautiful view and returning to the trailhead.
There are plenty of spots to get nice views of the arch and a “viewpoint” that allows you to get slightly closer along the northern side of the arch.
It’s the longest-span arch in North America, with over 306 feet of opening. It’s also very narrow, at only 6 feet wide at its narrowest.

Double O Arch
Distance: C: 1.2 miles | CC: 2.4 miles
Double O Arch is the best spot for those who want to see some arches and not necessarily do the entire primitive arch. If you are planning to come here and then turn around we recommend going clockwise.
You’ll need to ascend a Slickrock fin and cross another fin that is narrow at points. It requires minor pathfinding, as a few spots can be tricky to follow. There are a few trail markers, but they can be difficult to see if you are not close by. You can also visit the two arches below along the trail or from this arch.


Partition & Navajo Arches
Distance: C: 0.4 miles | CC: 3.4 miles
The above distances are to the spur for both arches. You’ll see the spur to both arches on your left (clockwise) or right (counterclockwise). Here, you’ll have two separate trails. Partition Arch is on the left and the Navajo Arch trail is straight.
It doesn’t matter which one you visit. Of the two, I had the better experience at Navajo Arch. It was a fun little trail getting there and then there was a pool of water underneath the arch. Every time water fell into the pool, it created a cool visual effect along the wall.
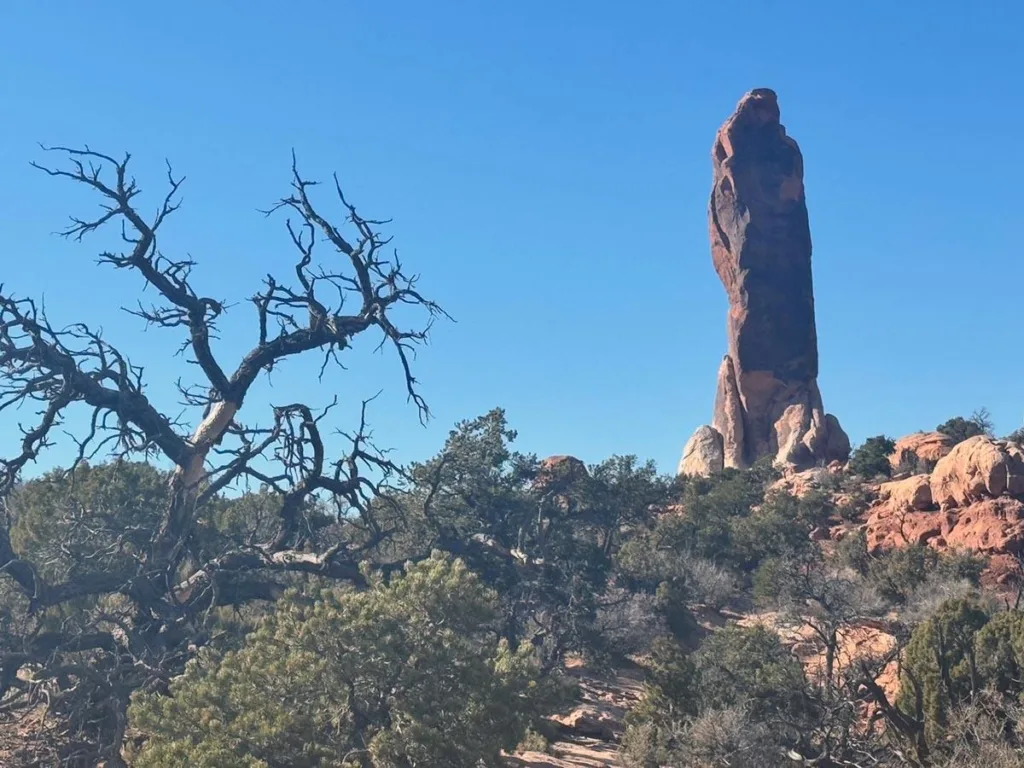
Dark Angel
Distance: C: 1.7+ miles | CC: 2.9+ miles
Dark Angel is a dark pillar that you’ll see in the distance from Double O Arch. The trail out there will take you closer and closer until you reach the arch. You can go as far as you want; the pillar just gets closer as you do.
The sign to Dark Angel says it’s 0.5 miles. That’s a lie. It’s easily twice that or more. You know as soon as we started in that direction another party returning told us point-blank that the trip “wasn’t worth it”.
Given that I’m a completionist, I did it anyway. But truly, I agree, this part of the hike is very missable.

Private Arch
Distance: C: 2.4 miles | CC: 2.1 miles
Private Arch is a fun little hike. The trail can be hard to see, but if you go high, you’ll have an easier time getting there. Part of the way down the hike, you’ll see a fin. Descend and continue past it. You cannot see the arch itself until you pass this fin. That’s what makes it so private!
You can stay low or high on your way back. Just be sure to find your way to the main trail again. I found that it can get a little tricky on the return.
Primitive Trail Information
The primitive trail is a loop that goes for several miles along after about 1 mile from the trailhead. The trail goes in either direction and counterclockwise is easier for 1 reason that I found.

About a distance of C: 2.5 miles | CC: 1.4 miles, you’ll come to a fairly steep cliff area. It is far easier to ascend (trail counterclockwise) than to descend (trail clockwise). You have to turn your body, scoot, and try to get a grip without slipping if you try to descend.
The trail between the cliff and the private arch has several areas you need to ascend and descend some steep areas. The one mentioned above was the most difficult.
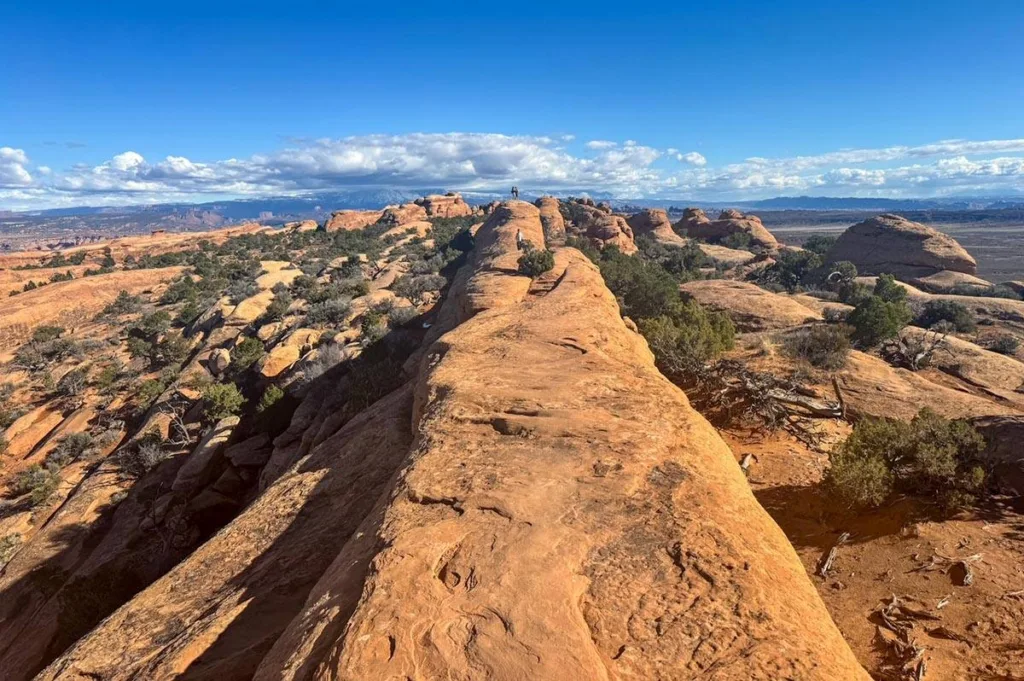
The early part of the trail going counterclockwise is sandy at first and then gets more slickrock. You’ll have a few narrow areas and some rock areas to walk along. There was one spot with water and a narrow canyon area that was hard to avoid stepping in water.

I found the area between the Double O arch and the cliff is fun but tricky. There were some sandy areas along some bushes and trees. It had quite a few spots that required some path-finding. It was really easy to lose the trail at several turns. I recommend downloading a trail map from your favorite trail app.
Between Double O Arch and Landscape Arch, you’ll have to cross some slick rock areas. This is probably the most popular area of the primitive trail as most folks who attempt the trail will go as far as Double O Arch.
Not far from Landscape Arch, you’ll have a slick rock area you’ll need to ascend (or descend (clockwise)). There’s also a fin you’ll need to cross. This part was scary in that it wasn’t obvious where to descend at first. You’ll need to trust and cross the fin until you get to the other end and see the trail.

Be sure to check out the Black Arch from the overlook. It’s right near the fin you need to cross.
Tips & FAQs
- Bring 2L of water: If you are doing the full trail it’s difficult and strenuous. You’ll want water
- Travel Counterclockwise: If you are planning to do the entire primitive trail. Avoid descending the steep cliff
- For the full primitive trail, the trail is not always obvious. A guide map is very handy. I helped several people avoid going in the wrong direction. Download a trail map or bring a paper one.
- Bring a battery pack if you are using your phone as a guide. My phone died on the trail 🙁
- Ascend and Descend the cliff areas carefully. I scooted on my butt a lot during those parts. Getting injured in those spots will make rescue and/or finishing the trail difficult.
- Stay on the Trail. Don’t climb arches; don’t go off in random directions. It’ll preserve the wilderness here.
Other Posts You May Like
- UTAH: Delicate Arch Hike Guide – Arches National Park
- UTAH: Angel’s Landing Hike Complete Guide: Zion National Park
- UTAH: NPS: Golden Spike National Historical Park
- COLORADO: Trail Through Time Hike – Grand Junction CO
- COLORADO: Guide to Mesa Verde National Park
- MULTI: ULTIMATE Denver to Moab Road Trips (Epic National Park Stops)
Leave a Reply